系统:
Distributor ID: Ubuntu
Description: Ubuntu 12.04.2 LTS
Release: 12.04
Codename: precise
硬件: 单台PC
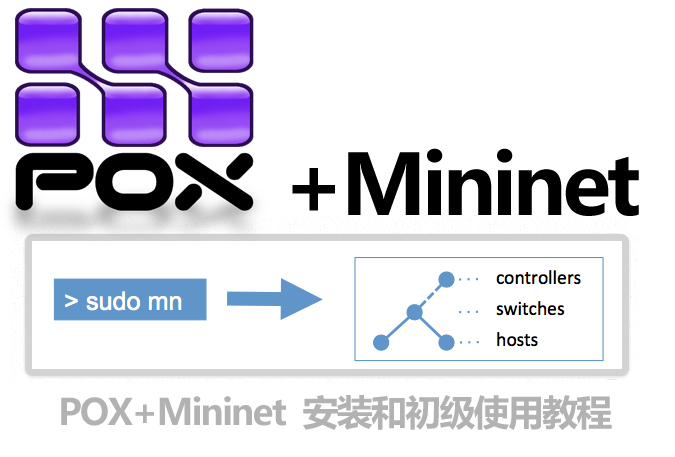
Mininet2.0、Open vSwitch的安装
最简单也是最常用的使用方法是下载打包好了的Mininet/Ubuntu VM(https://github.com/mininet/mininet/downloads/)。这个VM包括了Mininet,所有的openflow相关的文件和预装的软件,也可以调整内核配置来支持更大的Mininet网络。
上述的VM直接可以拿来用,但是要用像VirtualBox的软件来使用,这里就不赘述。
接下来,按照我们的环境来搭建测试组网正式开始。
首先进行源更新及安装、升级:apt-get update,apt-get upgrade。如果是初安装完的系统可能会更新较慢,建议将源更新设定到比较近、网络好的服务器,或者自己搭的服务器。
如果升级过Ubuntu系统或者使用的Mininet是旧版(1.0),需要把之前的Mininet和Open Vswitch从/usr/local/中删除。
sudo rm -rf /usr/local/bin/mn /usr/local/bin/mnexec \
/usr/local/lib/python*/*/*mininet* \
/usr/local/bin/ovs-* /usr/local/sbin/ovs-*
下一步,安装基础的Mininet包
sudo apt-get install mininet/precise-backports
这里需要安装的软件及库文件在90M左右,包括了mininet,openvswitch-common,openvswitch-controller,openvswitch-datapath-dkms,openvswitch-pki,openvswitch-switch,python2.7等。
root@10-6-2-133:/home/ubuntu# mn –version
2.0.0
Mininet安装完毕,下面简单测试下
root@10-6-2-133:/home/ubuntu# sudo mn –test pingall
*** Creating network
*** Adding controller
*** Adding hosts:
h1 h2
*** Adding switches:
Jul 14 13:45:44|00001|stream_unix|ERR|/tmp/stream-unix.17367.0: connection to /var/run/openvswitch/db.sock failed: No such file or directory
Jul 14 13:45:44|00002|reconnect|WARN|unix:/var/run/openvswitch/db.sock: connection attempt failed (No such file or directory)
Jul 14 13:45:45|00003|stream_unix|ERR|/tmp/stream-unix.17367.1: connection to /var/run/openvswitch/db.sock failed: No such file or directory
Jul 14 13:45:45|00004|reconnect|WARN|unix:/var/run/openvswitch/db.sock: connection attempt failed (No such file or directory)
ovs-vsctl exited with code -14
*** Error connecting to ovs-db with ovs-vsctl
Make sure that Open vSwitch is installed, that ovsdb-server is running, and that
“ovs-vsctl show” works correctly.
You may wish to try ”service openvswitch-switch start”.
从提示发现,Mininet需要开启service:openvswitch-switch
root@10-6-2-133:/home/ubuntu# service openvswitch-switch start
FATAL: Module openvswitch not found.
* Inserting openvswitch module
Module has probably not been built for this kernel.
Install the openvswitch-datapath-source package, then read
/usr/share/doc/openvswitch-datapath-source/README.Debian
FATAL: Module openvswitch not found.
* Inserting openvswitch module
模块openvswitch插入失败,此模块没有编译。在安装Mininet基础安装包的时候安装了openvswitch的相关包,唯独openvswitch-datapath-source 没有安装,所以接下来安装之。
root@10-6-2-133:/home/ubuntu#module-assistant auto-install openvswitch-datapath
Ps:若无module-assistant,apt-get install module-assistant
编译模块后再次尝试启动服务:
root@10-6-2-133:/home/ubuntu# service openvswitch-switch restart
* ovs-brcompatd is not running
* Killing ovs-vswitchd (30133)
* Killing ovsdb-server (30124)
* Starting ovsdb-server
* Configuring Open vSwitch system IDs
* Starting ovs-vswitchd
* iptables already has a rule for gre, not explicitly enabling
root@10-6-2-133:/home/ubuntu# service openvswitch-controller restart
* Restarting ovs-controller ovs-controller
下面查看ovs的各项运行状态
root@10-6-2-133:/home/ubuntu# ps -ea |grep ovs
30201 pts/0    00:00:00 ovsdb-server
30202 ?        00:00:00 ovsdb-server
30210 pts/0    00:00:00 ovs-vswitchd
30211 ?        00:00:00 ovs-vswitchd
一切准备就绪,那就测试Mininet是否可用啦
root@10-6-2-133:/home/ubuntu# sudo mn –test pingall
*** Creating network
*** Adding controller
*** Adding hosts:
h1 h2
*** Adding switches:
s1
*** Adding links:
(h1, s1) (h2, s1)
*** Configuring hosts
h1 h2
*** Starting controller
*** Starting 1 switches
s1
*** Ping: testing ping reachability
h1 -> h2
h2 -> h1
*** Results: 0% dropped (0/2 lost)
*** Stopping 2 hosts
h1 h2
*** Stopping 1 switches
s1 …
*** Stopping 1 controllers
c0
*** Done
completed in 0.423 seconds
到此,Mininet和Open vSwitch安装完毕。已经成功了一半了,哈哈!
Pox的初级使用
Pox是Nox的年轻点的同胞兄弟。核心意义在于,利用python的强大,提供了快速开发的平台和网络原型的控制软件。听着晦涩,其实就是python轻巧、便捷,开发起来舒服。
相对上面稍微复杂的安装,Pox的安装就简单多了,就叫绿色版的controller吧。相对其他的controller(Nox,Floodlight等),Pox集成的东西也简单多了,所以才需要二次开发嘛。
root@10-6-2-133:/home/ubuntu# git clone https://github.com/noxrepo/pox.git
Cloning into ’pox’…
remote: Counting objects: 12980, done.
remote: Compressing objects: 100% (5820/5820), done.
remote: Total 12980 (delta 7488), reused 12582 (delta 7113)
Receiving objects: 100% (12980/12980), 5.90 MiB | 22 KiB/s, done.
Resolving deltas: 100% (7488/7488), done.
Ps:git—-n. 饭桶,无用的人,其实是Gnu Interactive Tools的缩写,哈哈。
先来体验下pox吧
root@10-6-2-133:/home/ubuntu/pox# ./pox.py openflow.of_01 –address=127.0.0.1
POX 0.1.0 (betta) / Copyright 2011-2013 James McCauley, et al.
INFO:core:POX 0.1.0 (betta) is up.
pox.py是程序的入口,需要openflow.of_01库解释后面的参数。Pox默认开启6633端口监听,也可以在address后面指定port。
root@10-6-2-133:/home/ubuntu/pox# ./pox.py openflow.of_01 –address=127.0.0.1 –port=6666
POX 0.1.0 (betta) / Copyright 2011-2013 James McCauley, et al.
INFO:core:POX 0.1.0 (betta) is up.
也可以运行组件,组件就是要用到的app。
root@10-6-2-133:/home/ubuntu/pox# ./pox.py openflow.of_01 –address=127.0.0.1 –port=6666 py
POX 0.1.0 (betta) / Copyright 2011-2013 James McCauley, et al.
INFO:core:POX 0.1.0 (betta) is up.
This program comes with ABSOLUTELY NO WARRANTY.  This program is free software,
and you are welcome to redistribute it under certain conditions.
Type ’help(pox.license)’ for details.
Ready.
POX>
会有POX>输入提示,在这里可以编辑MSG或者调用组件的接口
接下来将Mininet,Pox联合使用,打开三个terminal,一个运行Pox,一个Mininet。Mininet和Pox的运行先后无关,因为Mininet始终在连接指定的controller ip。
Mininet
建立的topo为switch–h1,连接到本地controller的6666端口
|
h2
root@10-6-2-133:/home/ubuntu# mn –controller=remote,ip=127.0.0.1,port=6666
*** Creating network
*** Adding controller
*** Adding hosts:
h1 h2
*** Adding switches:
s1
*** Adding links:
(h1, s1) (h2, s1)
*** Configuring hosts
h1 h2
*** Starting controller
*** Starting 1 switches
s1
*** Starting CLI:
mininet>
mininet> dump
<RemoteController c0: 127.0.0.1:6666 pid=1103>
<OVSSwitch s1: lo:127.0.0.1,s1-eth1:None,s1-eth2:None pid=1114>
<Host h1: h1-eth0:10.0.0.1 pid=1110>
<Host h2: h2-eth0:10.0.0.2 pid=1111>
Pox
运行l2_pairs组件,该组件可以抽取packet——in中的dst_mac和src_mac,根据源和目的端口下发flow entry到switch,即工作在交换机模式。
root@10-6-2-133:/home/ubuntu/pox# ./pox.py openflow.of_01 –address=127.0.0.1 –port=6666 pox.forwarding.l2_pairs
POX 0.1.0 (betta) / Copyright 2011-2013 James McCauley, et al.
INFO:forwarding.l2_pairs:Pair-Learning switch running.
INFO:core:POX 0.1.0 (betta) is up.
INFO:openflow.of_01:[00-00-00-00-00-01 1] connected
Pox上提示INFO:openflow.of_01:[00-00-00-00-00-01 1] connected 有switch连接上,key为1。
现在查看switch上的flow entry,没有flow entry
mininet> dpctl dump-flows
*** s1 ————————————————————————
现在让h1 ping h2,触发flow entry的下发,有两条flow entry,并且h1 可以ping通 h2
mininet> h1 ping h2
PING 10.0.0.2 (10.0.0.2) 56(84) bytes of data.
64 bytes from 10.0.0.2: icmp_req=1 ttl=64 time=73.6 ms
64 bytes from 10.0.0.2: icmp_req=2 ttl=64 time=0.069 ms
64 bytes from 10.0.0.2: icmp_req=3 ttl=64 time=0.070 ms
^C
— 10.0.0.2 ping statistics —
3 packets transmitted, 3 received, 0% packet loss, time 2001ms
rtt min/avg/max/mdev = 0.069/24.579/73.600/34.663 ms
mininet> dpctl dump-flows
*** s1 ————————————————————————
in_port(2),eth(src=22:3d:65:e0:ae:46,dst=fa:06:6b:77:fe:d8),eth_type(0×0800),ipv4(src=10.0.0.2,dst=10.0.0.1,proto=1,tos=0,ttl=64,frag=no),icmp(type=0,code=0), packets:2, bytes:196, used:2.380s, actions:1
in_port(1),eth(src=fa:06:6b:77:fe:d8,dst=22:3d:65:e0:ae:46),eth_type(0×0800),ipv4(src=10.0.0.1,dst=10.0.0.2,proto=1,tos=0,ttl=64,frag=no),icmp(type=8,code=0), packets:2, bytes:196, used:2.380s, actions:2
作者:@OFIREMan